Tuesday, June 25, 2013

Chubby Hubby Buckeye Truffles!

The past couple of days I have really been craving some sweets! So I did what I do best, I went to Pinterest to find something yummy to make.  It didn’t take me long to find the perfect recipe to soothe my sweet tooth!  I followed the link to Six Sisters’ Stuff and got the recipe to make some delicious Chubby Hubby Buckeye Truffles (even the name sounds sweet!).  I was very excited to find out that I already had pretty much everything I needed at my house to make these; all I needed to buy was some chocolate chips.


This recipe is pretty simple and doesn’t have too many ingredients. All you need is:
·      1 ½ cup crushed pretzel pieces
·      ½ cup creamy peanut butter
·      1 tablespoon unsalted butter (at room temperature)
·      2 tablespoons brown sugar
·      Pinch of salt
·      3 tablespoons powdered sugar
·      1 cup chocolate chips (I used milk chocolate)
·      1 tablespoon vegetable shortening


All of our ingredients!
The first thing you do when making these is break up some pretzels and put them into a bag to crush them, using a rolling pin works really well. 

She loved getting to crush the pretzels!
In a bowl mix together the peanut butter, butter, brown sugar, and salt until they everything is combined and creamy.  
Mackenzie making faces while mixing
Next add in the crushed up pretzels and powdered sugar and mix until they are completely combined.  


Before we mixed everything in.
Now that everything is mixed together it’s time to make the peanut butter pretzel balls! Get out a baking sheet and cover it with wax paper.  When forming the truffles you can use a small cookie scoop, but I just guessed.  Roll them gently into a ball your hands; it makes it a lot easier to do this if your hands are wet.  Once all the truffles are formed and on the sheet place them in the freezer for at least half an hour.

The peanut butter balls before I put them in the freezer.
Once you take the truffles out of the freezer its time to melt the chocolate!  To do this put the chocolate chips and vegetable shortening in a bowl and set the microwave to fifty percent and microwave for thirty seconds intervals until they are completely melted, make sure you stir the chocolate every thirty seconds.  
Our melted chocolate.
Once all the chocolate is melted you can start dipping the truffles in it.  Make sure every ball gets completely covered with chocolate; make sure you let the extra chocolate drip off before you put it back down on the sheet.  After all of the peanut butter pretzel balls are covered with chocolate put the sheet back into the freezer for at least a half an hour. 


Before I put them back in freezer.
When you pull the truffles out of the freezer you can either eat them just as they are or you can melt down some peanut butter and drizzle it over the tops of all the truffles. 


Some finished truffes!!
All together these took about 2 hours to make (including when they were in the freezer), and they were worth the wait! They were the perfect combination of peanut butter and chocolate, with the perfect amount of salt mixed in!  I hope you guys enjoy these as much as I did!

Friday, June 21, 2013

Flubber!!

I will just come out and admit it I am totally and completely addicted to Pinterest! It is always, and I mean always, open on my laptop.  I love getting on and finding new things to do and try.  One of my favorite things to do on Pinterest is look for fun new activities to try with my 9 year old little sister.  Recently I found a recipe to make flubber.  It looked pretty fun so I followed the link to Live Craft Eat where I found the perfect tutorial on how to make some awesome flubber.  So I decided that it would be a great activity to do with my sister.  When I told her that we were going to make flubber she had absolutely no idea what I was talking about so I did what any person would do, I drove to the movie store and rented Flubber so she could watch it.  

I can't believe this movie is 15 years old! Image found here.

Now that she knew what I was talking about when I said flubber it was time to try making this awesome concoction!!

It didn’t take to much make this. All we need was:
·      ¾ cup of cold water
·      2 four ounce bottles of Elmers glue
·      food coloring
·      ½ cup hot water
·      1 teaspon of borax (you can find it in the laundry aisle)

All of our ingredients!
Getting all the ingredients together is seriously the hardest part of this process.  Once you get all your ingredients together get out two different bowls.  In one bowl mix together the cold water, the glue, and the food coloring. 

Adding in all the glue.
Mixing in our food coloring.
 In the other bowl mix the hot water and the borax together until the borax is completely dissolved. 
Before all the borax was dissolved.
Once all of the borax is dissolved pour the glue mixture into the borax mixture and then pour off all the extra water. That’s it! 

She thought it felt so weird at first.

She made an adorable melting snowman!
It’s a super simple recipe that my sister and I have gotten hours of fun out of!! I hope you have as much fun with it as we did! I can't wait to how it went for all of you!

Monday, June 17, 2013

T-Shirt Bracelets

Today my sisters and I decided that we were going to make some t-shirt bracelets.  We thought it would be a fun and quick little project, and while it was definitely fun it took a very long time to actually do it.  The main reason it took so long was because we had to cut up all of the t-shirts (we used 5) into strips.  But the bracelets turned out awesome!!

All we needed for these were:
Old t-shirts
Thread
Needle
Scissors

All the shirts before I cut them.
The first thing that I did was cut the t-shirts.  I thought it was easiest to cut out the seems and stitches first and then cut them into strips (around 16 or so inches).

The strips from all my t-shirts.
When I finished cutting the shirts into strips I picked my three different strips and sewed the tops of them together, but if you wanted you could just hold them together with a binder clip I just didn't like not having the strands attached to each other.

My attempt at trying to use a binder clip.
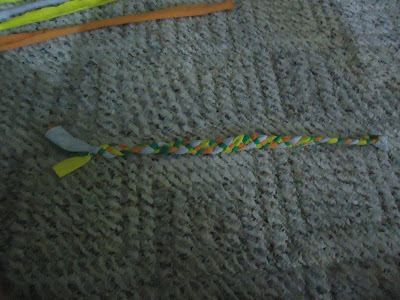
After they were sewed together I started braiding the strands together.  This was kind of hard to do, but if you have someone else hold the top while you start the braid it makes it much easier! I continued to braid my strips together until I got to the end.  When I reached the end I sewed the separate strips together again. Once they were sewn together it was way too long to be a bracelet, but could have made a great headband.

My giant bracelet!
I had my mom help me tie it on my wrist and cut the extra off.  My bracelet was now actually the size it should be, and I sewed the edges again, just so that they wouldn’t fray too much!

My second t-shirt bracelet and first attempt at learning how to fishtail braid!


The third bracelet that i made!
Overall this was a really fun project that I didn’t need anything for that wasn’t already in my house!  I would definitely make these again because they are super easy and fun! They also didn’t take too long, once we got all the t-shirts got cut up!

I would love to hear your feedback on my project!! 

Sunday, June 16, 2013

Hey!

Hey! I have wanted to start a blog for a really long time and finally decided to do it!


I am a 19-year-old college sophomore.  I am majoring in advertising and public relations.  I am pretty much your average college girl, but I can be pretty nerdy sometimes.  I absolutely love to read (so be expecting some awesome book reviews), I read pretty much every kind of book, and I have a really hard time picking a favorite one because I love them all in different ways.  I am also totally and completely obsessed with everything Disney!!!  I am currently counting down the days till my next trip to Disney World in October (I get to go to Mickey’s not so scary Halloween party!!!!!).  I like many others have a complete addiction to pinterest, it is always open on my laptop, I waste hours upon hours of my life on it everyday.  This is most likely what the vast majority of my posts will be about, because I love actually trying the things that I find on pinterest.  I can’t wait to start sharing my life with all of you!